
4种JavaScript实现简单tab选项卡切换的方法
本文实例讲解了4种JavaScript实现简单tab选项卡切换的方法,分享给大家供大家参考,具体内容如下
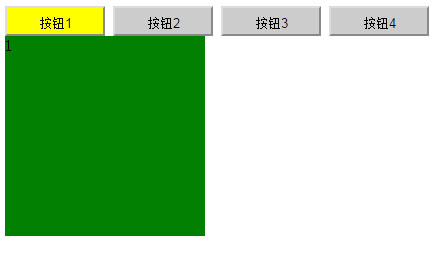
效果图:
方法一:for循环+if判断当前点击与自定义数组是否匹配
<!DOCTYPE html>
<html lang="en">
<head>
 <meta charset="UTF-8">
 <title>tab切换</title>
 <style type="text/css">
 button {
  width:120px;
  height: 32px;
  line-height: 32px;
  background-color: #ccc;
  font-size: 24px;
 }
 div {
  display: none;
  width:200px;
  height: 200px;
  font-size: 72px;
  color:#ddd;
  background-color: green;
  border:1px solid black;
 }
 </style>
</head>
<body>
 <button style="background-color: yellow;">1</button>
 <button>2</button>
 <button>3</button>
 <button>4</button>
 <div style="display:block;">1</div>
 <div>2</div>
 <div>3</div>
 <div>4</div>
 <script type="text/javascript">
 //定义数组并获取数组内各个的节点
 var buttonArr = document.getElementsByTagName("button");
 var divArr = document.getElementsByTagName("div");
 for(var i = 0; i < buttonArr.length;i++) {
 buttonArr[i].onclick = function() {
  //this
  // alert(this.innerHTML)
  //for循环遍历button数组长度
  for(var j = 0; j < buttonArr.length; j++) {
  //重置所有的button样式
  buttonArr[j].style.backgroundColor = "#ccc";
  //给当前的(点击的那个)那个button添加样式
  this.style.backgroundColor = "yellow";
  //隐藏所有的div
  divArr[j].style.display = "none";
  //判断当前点击是按钮数组中的哪一个?
  if(this == buttonArr[j]) {
   // alert(j);
   //显示点击按钮对应的div
   divArr[j].style.display = "block";
  }
  }
 }
 }
 </script>
</body>
</html>
方法二:自定义index为当前点击
<!DOCTYPE html>
<html lang="en">
<head>
 <meta charset="UTF-8">
 <title>tab切换</title>
 <style type="text/css">
 button {
  width:120px;
  height: 32px;
  line-height: 32px;
  background-color: #ccc;
  font-size: 24px;
 }
 div {
  display: none;
  width:200px;
  height: 200px;
  font-size: 72px;
  color:#ddd;
  background-color: green;
  border:1px solid black;
 }
 </style>
</head>
<body>
 <button style="background-color: yellow;">1</button>
 <button>2</button>
 <button>3</button>
 <button>4</button>
 <div style="display:block;">1</div>
 <div>2</div>
 <div>3</div>
 <div>4</div>
 <script type="text/javascript">
 var buttonArr = document.getElementsByTagName("button");
 var divArr = document.getElementsByTagName("div");
 for(var i = 0; i < buttonArr.length;i++) {
 buttonArr[i].index = i;
 // buttonArr[i].setAttribute("index",i);
 buttonArr[i].onclick = function() {
  for(var j = 0; j < buttonArr.length; j++) {
  buttonArr[j].style.backgroundColor = "#ccc";
  buttonArr[this.index].style.backgroundColor = "yellow";
  divArr[j].style.display = "none";
  divArr[this.index].style.display = "block";
  }
 }
 }

 </script>
</body>
</html>
方法三:className
<!doctype html>
<html lang="en">
<head>
 <meta charset="UTF-8">
 <title>tab</title>
 <style type="text/css">
 * {padding:0; margin:0;}
 button {
  background-color: #ccc;
  width:80px;
  height: 30px;
 }
 .btn-active {
  background-color: yellow;
  font-weight:bold;
  font-size: 14px;
 }
 div{
  width:200px;
  height: 200px;
  font-size: 64px;
  background-color: #0c0;
  display: none;
  color:#fff;
 }
 .div-active {
  display: block;
 }
 </style>
</head>
<body>
 <button class="btn-active">按钮1</button>
 <button>按钮2</button>
 <button>按钮3</button>
 <button>按钮4</button>
 <div class="div-active">1</div>
 <div>2</div>
 <div>3</div>
 <div>4</div>
 <script type="text/javascript">
 //1.先获取元素
 var buttonList = document.getElementsByTagName("button");
 var divList = document.getElementsByTagName("div");
 //2.添加事件
 for(var i = 0; i < buttonList.length; i++) {
 buttonList[i].index = i;
 buttonList[i].onclick = function() {
  for(var j = 0; j < buttonList.length;j++) {
  buttonList[j].className = "";
  divList[j].className = "";
  }
  this.className = "btn-active";
  divList[this.index].className = "div-active";
 }
 }
 </script>
</body>
</html>
方法四:className+匿名函数的自执行
<!doctype html>
<html lang="en">
<head>
 <meta charset="UTF-8">
 <title>tab</title>
 <style type="text/css">
 * {padding:0; margin:0;}
 button {
  background-color: #ccc;
  width:80px;
  height: 30px;
 }
 .btn-active {
  background-color: yellow;
  font-weight:bold;
  font-size: 14px;
 }
 div{
  width:200px;
  height: 200px;
  font-size: 64px;
  background-color: #0c0;
  display: none;
  color:#fff;
 }
 .div-active {
  display: block;
 }
 </style>
</head>
<body>
 <button class="btn-active">按钮1</button>
 <button>按钮2</button>
 <button>按钮3</button>
 <button>按钮4</button>
 <div class="div-active">1</div>
 <div>2</div>
 <div>3</div>
 <div>4</div>
 <script type="text/javascript">
 //1.先获取元素
 var buttonList = document.getElementsByTagName("button");
 var divList = document.getElementsByTagName("div");
 //2.添加事件
 for(var i = 0; i < buttonList.length; i++) {
 (function(i){ //匿名函数自执行
  buttonList[i].onclick = function() {
  for(var j = 0; j < buttonList.length;j++) {
   buttonList[j].className = "";
   divList[j].className = "";
  }
  this.className = "btn-active";
  divList[i].className = "div-active";
  }
 })(i)
 }
 </script>
</body>
</html>
如果大家还想深入学习,可以点击两个精彩的专题:javascript选项卡操作方法汇总 jquery选项卡操作方法汇总
希望本文所述对大家学习javascript程序设计有所帮助。
JavaScript类型系统之基本数据类型与包装类型
写在前面的话javascript的数据类型可以分为两种:原始类型和引用类型原始类型也称为基本类型或简单类型,因为其占据空间固定,是简单的数据段,为
谷歌Chrome浏览器扩展程序开发小记
根据公司的规定,每月八小时,弹性工作制。所以大家平时来的不太准时,如果有事,下班也就早些回去了。所以一个月下来工作时间可能不够,但是
2016年最热门的15 款代码语法高亮工具,美化你的代码
前言:代码高亮很有用,特别是在需要在网站或者blog中显示自己编写的代码的时候,或者给其他人查看或调试语法错误的时候。我们可以将代码高亮,